How to Draw a Arm Step by Step
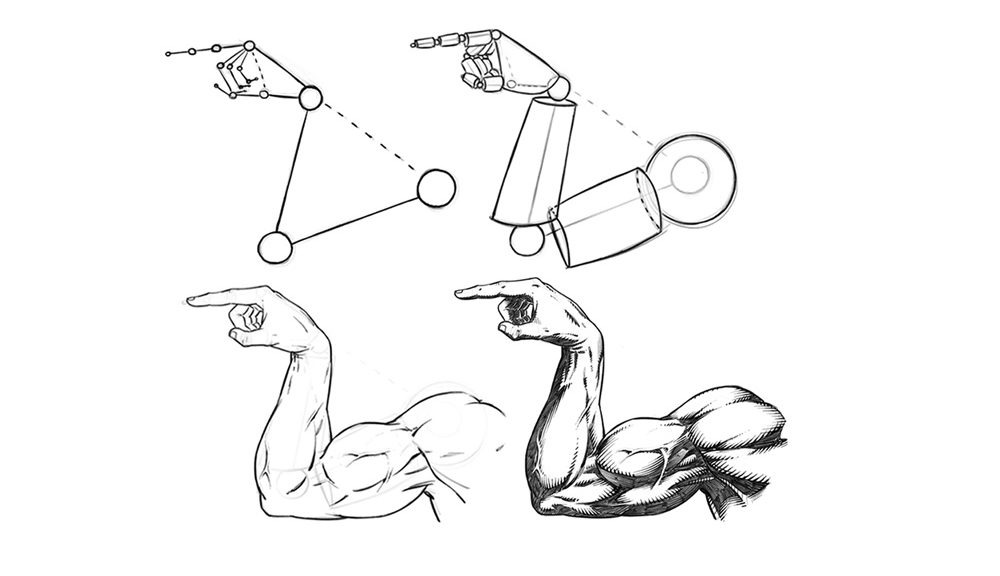
In this tutorial we will be drawing a male muscular arm. This time it's the old, "Which Way to the Beach" pose. We have all done it one time or another, right? Let's get to it!
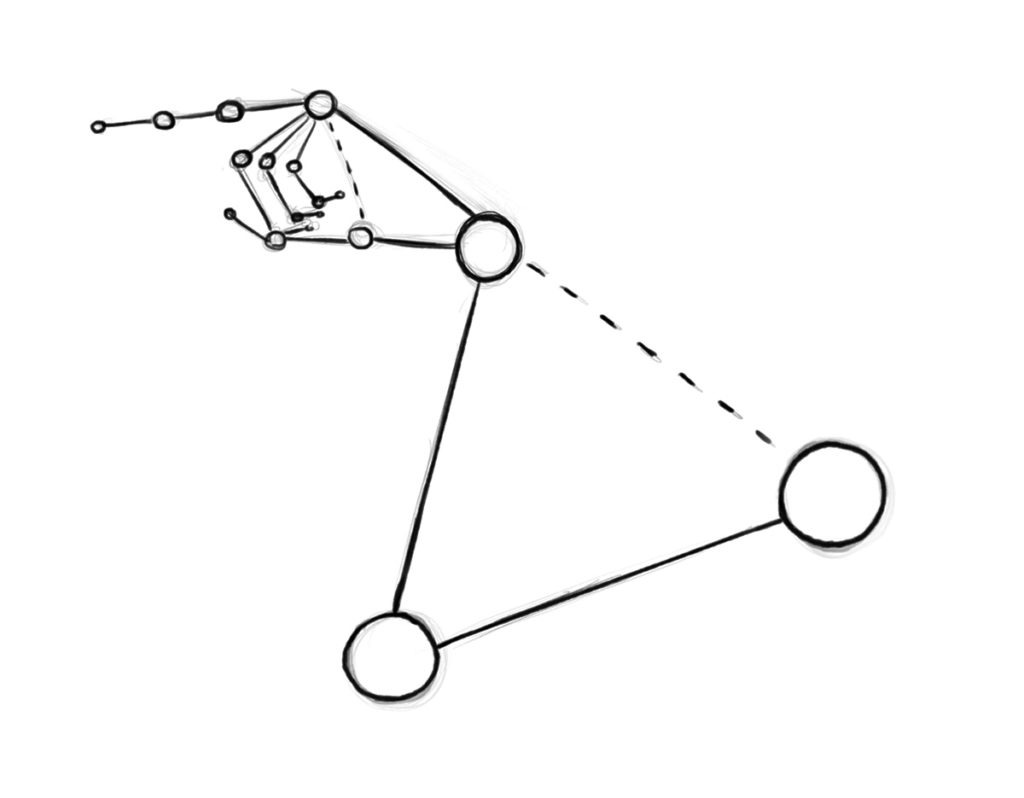
Step 1 – Draw out the direction of the pose with the line and circle method. Think of these like the bones under the muscles and at this stage just focus on the length and direction of each section of the arm and hand. Notice the relationship from the wrist to the shoulder and the shape of the base of the hand from this angle.
They are both triangular. It helps to notice shapes like these to make your drawings more consistent.
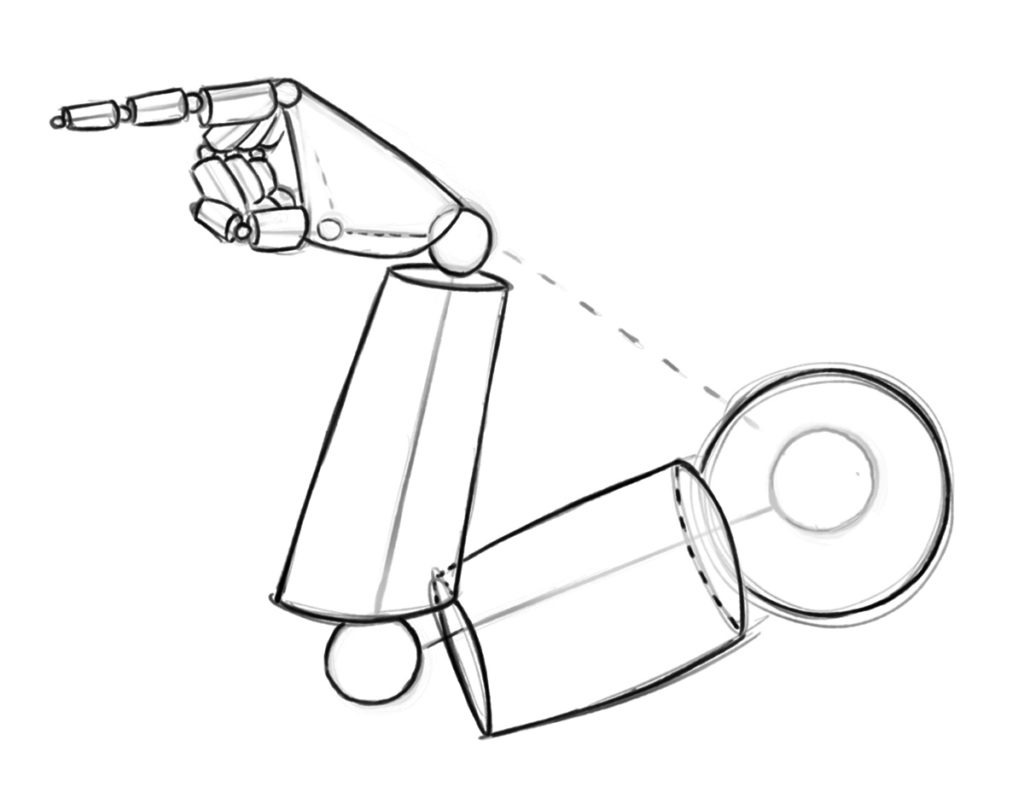
Step 2 – Now draw out the cylinder shapes to establish the basic forms. Think of a mannequin or marionette. Keep it simple and still only think about proportions and direction of the segments. Also be open to changes at any stage of this process. Correcting things early on will save you lots of time and heartache.
Step 3 – Now soft erase your lines and start to draw more curvature for your anatomy. Notice the way that each area tapers inward to meet the next. The shoulder tapers in to meet the upper arm and the upper arm tapers in the meet the lower arm and so forth. And notice where I changed the shape of the anatomy to go inside and outside of the initial mannequin stage. The basic construction is only meant to be a guide, so I never hesitate to make changes if I see something that could be better.
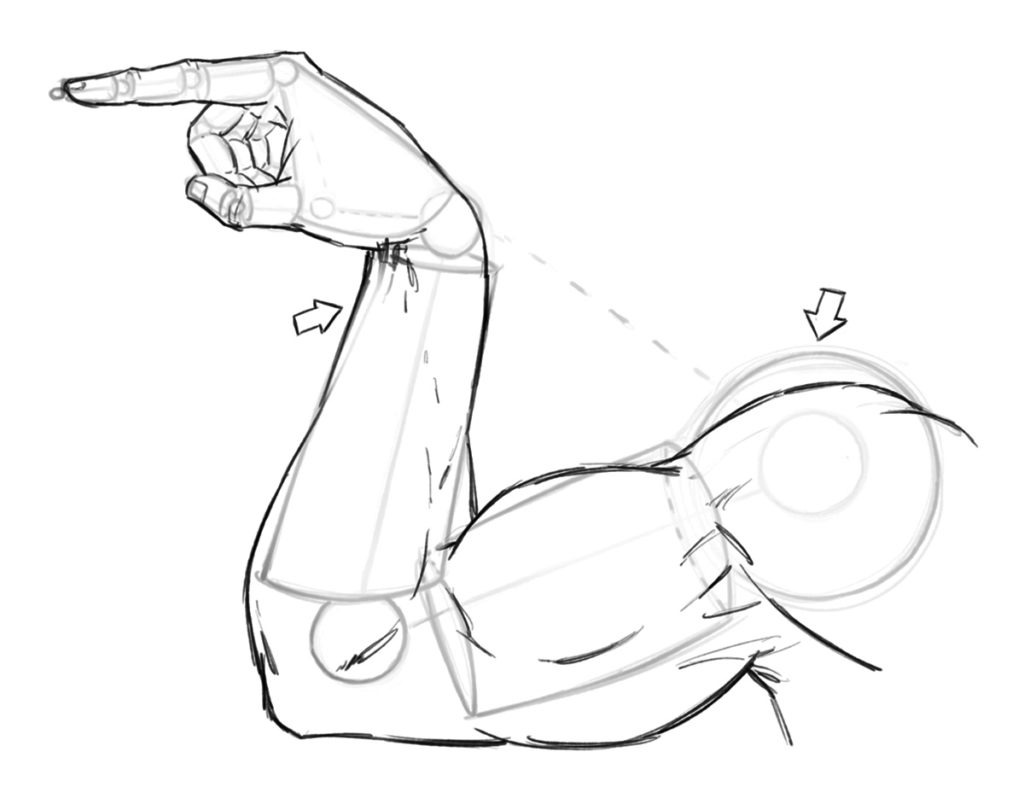
Quick Tip – Study anatomy often but improve over a long period of time. Don't let the idea of perfection slow you or stop you from completing your work!
Step 4 – Now like before, soft erase your lines and begin to refine the anatomy a bit more. This time giving more line weight and clarity to the drawing. You can also start to draw in some veins to add to the depth and realism to the drawing.
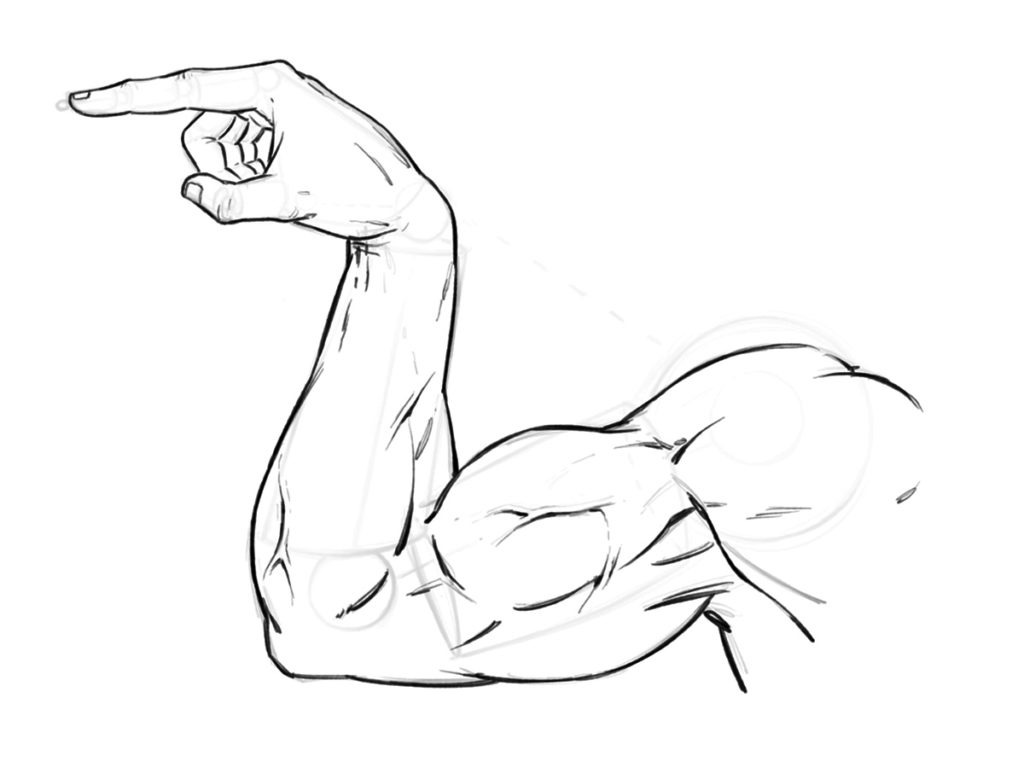
Step 5 – Draw in the shapes of shadows to your muscles. And if you are working with an inker make sure to sketch the small x's so they can read the artwork more clearly. You don't necessary have to do this step if you are your own inker but it doesn't hurt to get in the habit, just in case!
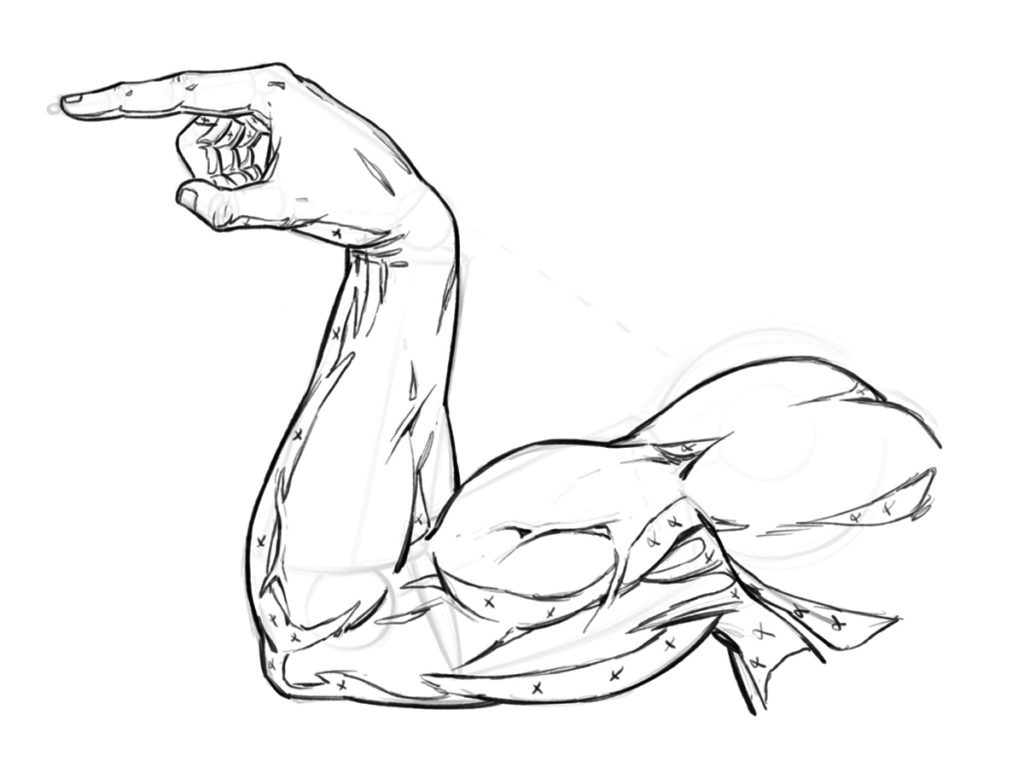
Step 6 – Now add in your rendering lines and really start to make the artwork pop off the page. Notice how the veins cast a small shadow of their own on one side. And, how they catch light on them even in the shadow of the arm. This is more stylized but it gives the appearance of depth. Overall this is a very stylized arm drawing but that is the fun of comics, not everything has to be entirely accurate!
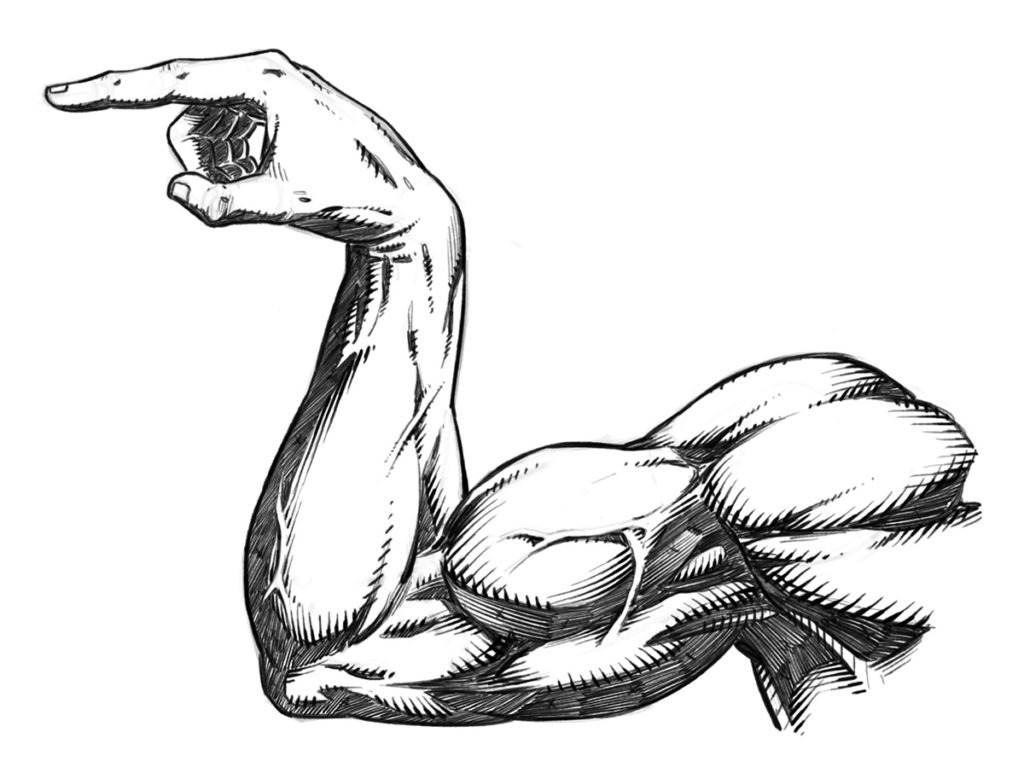
I hope you've enjoy this quick tutorial on stylized arm anatomy for comics. This is a sample tutorial from my book "Learn to Draw Action Heroes" which you can find on Amazon or at Barnes and Nobel.
If you want more educational content like this and prefer video courses you can get them here – https://ram-studios-comics-art-school.teachable.com
Thank you for stopping by and more tutorials are on the way soon.
Keep drawing keep having fun! 🙂
-Robert
An Educational Resource for Comic Art Creators and Digital Painters.
How to Draw a Arm Step by Step
Source: https://ramstudioscomics.com/index.php/2021/04/21/how-to-draw-a-muscular-arm-pose-step-by-step-tutorial/
0 Response to "How to Draw a Arm Step by Step"
Post a Comment